Manage your secrets in Kubernetes with external-secrets & HashiCorp Vault

- TechAdvocate
- DevSecOps / Cloud platform Lead Architect @ Sopra Steria
- Speaker @ Devoxx, Snowcamp, Breizhcamp, GitLab Connect and internally
- Co-Founder of Volcamp IT Conference @ Clermont-Fd (https://volcamp.io)
- GitLab Hero
Handling secrets in a Kubernetes cluster is quite common but should be handled carefully. With external-secrets, it is easily possible to plug a secret management system into your cluster to have clean secret management. If you are using Kubernetes managed services on a cloud provider, external-secrets can be configured to use the cloud provider secret management service such as Azure Key Vault or AWS Secret Management. The full list can be found on the provider page.
In this article, I will cover the HashiCorp Vault provider to be cloud agnostic. So let's start by installing Vault.
Install Vault
There are several ways to install Vault in your cluster, but Helm chart is an easy one. Just add the HashiCorp Helm repository and check that Vault is available. Then install the chart hashicorp/vault in a dedicated namespace vault.
# Add HashiCorp repository
$ helm repo add hashicorp https://helm.releases.hashicorp.com
"hashicorp" has been added to your repositories

# Check charts available
$ helm search repo hashicorp
NAME                                  CHART VERSION    APP VERSION    DESCRIPTION
hashicorp/consul                      1.2.2            1.16.2         Official HashiCorp Consul Chart
hashicorp/terraform                   1.1.2                           Install and configure Terraform Cloud Operator ...
hashicorp/terraform-cloud-operator    0.0.7            2.0.0-beta6    A Helm chart for HashiCorp Terraform Cloud Kube...
hashicorp/terraform-enterprise        1.0.0            1.16.0         Official HashiCorp Terraform-Enterprise Chart
hashicorp/vault                       0.26.1           1.15.1         Official HashiCorp Vault Chart
hashicorp/vault-secrets-operator      0.3.4            0.3.4          Official Vault Secrets Operator Chart
hashicorp/waypoint                    0.1.21           0.11.3         Official Helm Chart for HashiCorp Waypoint

# Or more specific
$ helm search repo hashicorp/vault
NAME                                CHART VERSION    APP VERSION    DESCRIPTION
hashicorp/vault                     0.26.1           1.15.1         Official HashiCorp Vault Chart
hashicorp/vault-secrets-operator    0.3.4            0.3.4          Official Vault Secrets Operator Chart

# Install the chart in a dedicated namespace
$ helm install vault hashicorp/vault --namespace vault
After a few seconds, 2 pods are created and running
$ kubectl get po -n vault
NAME                                    READY   STATUS    RESTARTS   AGE
vault-0                                 0/1     Running   0          137m
vault-agent-injector-7c48dbf948-mpx2c   1/1     Running   0          137m
But we can see that vault-0 is in Running state but not ready 0/1. This is because we need the operator to be initialized. This will generate 2 mandatory elements to be able to use Vault:
Unseal keys are required to unseal the vault and thus to read/write data within it.
Root token is necessary to log in to the vault when unsealed
$ kubectl exec -ti vault-0 -- vault operator init
Unseal Key 1: GYnIlXwCsw2pxxxxxxxxxxxxxxxxxxxxxxxxxxxxxxxx
Unseal Key 2: hNwErhyDNFJ9xxxxxxxxxxxxxxxxxxxxxxxxxxxxxxxx
Unseal Key 3: E1q3wW3H8Bbdxxxxxxxxxxxxxxxxxxxxxxxxxxxxxxxx
Unseal Key 4: /JdQzpz2QpWMxxxxxxxxxxxxxxxxxxxxxxxxxxxxxxxx
Unseal Key 5: aosZE51spR3/xxxxxxxxxxxxxxxxxxxxxxxxxxxxxxxx

Initial Root Token: hvs.xxxxxxxxxxxxxxxxxxxxxxxxxxxxxxxx
Now, we can unseal the vault. To do so, we need to run 3 times the unseal command. Why 3? Because Vault sealing process is based on Shamir secret sharing mechanism. With this mechanism, you split the secret into several keys and you need to provide N keys to unseal the access to the vault. Here we will need 3 out of 5 keys to unseal Vault. This can be any 3 of the 5 generated during the init command. Let's unseal our vault
$ kubectl exec -ti vault-0 -n vault -- vault operator unseal
Unseal Key (will be hidden):
Key                Value
---                -----
Seal Type          shamir
Initialized        true
Sealed             true
Total Shares       5
Threshold          3
Unseal Progress    1/3
Unseal Nonce       38a75a5d-357e-8ee0-ce91-ec104f1b0793
Version            1.15.1
Build Date         2023-10-20T19:16:11Z
Storage Type       file
HA Enabled         false
# Sealed state is true & Unseal Progess is 1/3

# Run a second time the same command and provide another key
$ kubectl exec -ti vault-0 -n vault -- vault operator unseal
Unseal Key (will be hidden):
Key                Value
---                -----
[...]
Sealed             true
[...]
Unseal Progress    2/3
[...]
# Sealed state is still true & Unseal Progess is 2/3

# Run a second time the same command and provide another key
$ kubectl exec -ti vault-0 -n vault -- vault operator unseal
Unseal Key (will be hidden):
Key             Value
---             -----
[...]
Sealed          false
[...]
# Sealed state is now false
Now that the vault is unsealed, we can configure some elements:
a policy to give access in read mode that will be used by external-secrets
enable the authentication method for Kubernetes. This allows components to authenticate to access the vault with a service account token
but first, we need to log into the vault with the root token we retrieved earlier
# Enter vault pod
$ kubectl exec -ti vault-0 -- sh
# Login with root token
$ vault login
Token (will be hidden):
Success! You are now authenticated. The token information displayed below
is already stored in the token helper. You do NOT need to run "vault login"
again. Future Vault requests will automatically use this token.

# Create a policy with read access to everything "*"
$ vault policy write external-secrets-policy -<<EOF
> path "*"
> {  capabilities = ["read"]
> }
> EOF
Success! Uploaded policy: external-secrets-policy

# Enable authentication method for Kubernetes
$ vault auth enable kubernetes
Success! Enabled kubernetes auth method at: kubernetes/
With Helm installation, a service account is created but there is no token created with it by default. NB: this behavior appears with Kubernetes v1.24+. For previous versions, the token should be automatically created.
$ kubectl describe sa vault -n vault
Name:                vault
Namespace:           vault
Labels:              app.kubernetes.io/instance=vault
                     app.kubernetes.io/managed-by=Helm
                     app.kubernetes.io/name=vault
                     helm.sh/chart=vault-0.26.0
Annotations:         meta.helm.sh/release-name: vault
                     meta.helm.sh/release-namespace: vault
Image pull secrets:  <none>
Mountable secrets:   <none>
Tokens:              <none>
Events:              <none>
So we need to create a secret with a type service-account-token and also create a ClusterRoleBinding for the service account
apiVersion: v1
kind: Secret
metadata:
  namespace: vault
  name: vault-auth
  annotations:
    kubernetes.io/service-account.name: "vault"
type: kubernetes.io/service-account-token
---
apiVersion: rbac.authorization.k8s.io/v1
kind: ClusterRoleBinding
metadata:
   name: role-tokenreview-binding
   namespace: vault
roleRef:
   apiGroup: rbac.authorization.k8s.io
   kind: ClusterRole
   name: system:auth-delegator
subjects:
- kind: ServiceAccount
  name: vault
  namespace: vault
We can apply them in our namespace
$ kubectl apply -n vault -f vault-secret.yml
$ kubectl apply -n vault -f vault-rbac.yml
Now, we can see that a token is available for the service account
$ kubectl describe sa vault -n vault
Name:                vault
[...]
Tokens:              vault-auth
[...]
We use now this token to configure the Kubernetes authentication method in Vault.
# Populate wome variables regarding k8s configuration
$ k8s_host="$(kubectl exec vault-0 -n vault -- printenv | grep KUBERNETES_PORT_443_TCP_ADDR | cut -f 2- -d "=" | tr -d " ")"
$ k8s_port="443"
$ k8s_cacert="$(kubectl config view --raw --minify --flatten -o jsonpath='{.clusters[].cluster.certificate-authority-data}' | base64 --decode)"
$ tr_account_token="$(kubectl get secret vault-auth -o jsonpath='{ .data.token }' | base64 --decode)"

# Create the configuration into vault for Kubernetes authentication method
$ kubectl exec vault-0 -n vault -- \
vault write auth/kubernetes/config \
token_reviewer_jwt="${tr_account_token}" \
kubernetes_host="https://${k8s_host}:${k8s_port}" \
kubernetes_ca_cert="${k8s_cacert}" \
disable_issuer_verification=true

Success! Data written to: auth/kubernetes/config
Vault is now set up, we can step in to install external-secrets.
Install external-secrets
As Vault, external-secrets can easily be installed with Helm.
# Add external-secrets repository
$ helm repo add external-secrets https://charts.external-secrets.io
"external-secrets" has been added to your repositories

# Check charts available
$ helm search repo external-secrets
NAME                                 CHART VERSION    APP VERSION    DESCRIPTION
external-secrets/external-secrets    0.9.8            v0.9.8         External secret management for Kubernetes

# Install the chart in a dedicated namespace
$ helm install external-secrets external-secrets/external-secrets -n external-secrets --create-namespace

# Check elements initialized
$ kubectl get all -n external-secrets
NAME                                                   READY   STATUS    RESTARTS   AGE
pod/external-secrets-cert-controller-55f8f6bf8-7prrf   1/1     Running   0          2d13h
pod/external-secrets-ddb8ff7cb-gzm4l                   1/1     Running   0          2d13h
pod/external-secrets-webhook-5996b9bf79-krbgr          1/1     Running   0          2d13h

NAME                               TYPE        CLUSTER-IP     EXTERNAL-IP   PORT(S)   AGE
service/external-secrets-webhook   ClusterIP   10.3.151.119   <none>        443/TCP   2d13h

NAME                                               READY   UP-TO-DATE   AVAILABLE   AGE
deployment.apps/external-secrets                   1/1     1            1           2d13h
deployment.apps/external-secrets-cert-controller   1/1     1            1           2d13h
deployment.apps/external-secrets-webhook           1/1     1            1           2d13h

NAME                                                         DESIRED   CURRENT   READY   AGE
replicaset.apps/external-secrets-cert-controller-55f8f6bf8   1         1         1       2d13h
replicaset.apps/external-secrets-ddb8ff7cb                   1         1         1       2d13h
replicaset.apps/external-secrets-webhook-5996b9bf79          1         1         1       2d13h
External-secrets is up and running. We can now link Vault to it.
Link external-secrets and vault
Before creating the role for external-secrets in Vault, we need to do the same as for Vault service account and create a token for the external-secrets one.
apiVersion: v1
kind: Secret
metadata:
  namespace: external-secrets
  name: external-secrets
  annotations:
    kubernetes.io/service-account.name: "external-secrets"
type: kubernetes.io/service-account-token
$ kubectl apply -n external-secrets -f external-secrets-secret.yml
Now we create a role for the Kubernetes authentication method so that external-secrets service account can access resources according to the given policy. In our case, we allow the reading of all resources ("*")
# Retrieve token
$ es_account_token="$(kubectl get secret external-secrets -o jsonpath='{ .data.token }' | base64 --decode)"
# Create a role to link service account to policy
$ kubectl exec vault-0 -n vault -- vault write auth/kubernetes/role/external-secrets-role \
    bound_service_account_names=external-secrets \
    bound_service_account_namespaces=external-secrets \
    policies=external-secrets-policy \
    ttl=24h
After, we authorize the role to login
$ kubectl exec vault-0 -n vault -- \
    vault write auth/kubernetes/login role=external-secrets-role jwt=$es_account_token

Key                                       Value
---                                       -----
token                                     hvs.xxxxxxxx
token_accessor                            SSxxxxxxxxxx
token_duration                            24h
token_renewable                           true
token_policies                            ["default" "external-secrets-policy"]
identity_policies                         []
policies                                  ["default" "external-secrets-policy"]
token_meta_service_account_name           external-secrets
token_meta_service_account_namespace      external-secrets
token_meta_service_account_secret_name    external-secrets
token_meta_service_account_uid            5db49616-4c89-4a5f-a1aa-b3709ac0ea32
token_meta_role                           external-secrets-role
External-secrets is allowed to read elements in Vault. We need to know to store secrets. Vault supports several engines but here we are using the key/value one. Let's enable it.
$ kubectl exec vault-0 -n vault -- vault secrets enable -version=2 kv
Success! Enabled the kv secrets engine at: kv/
External-secrets stores secrets in a SecretStore. We configure the store to retrieve elements from Vault in the kv engine previously set and with the role defined to authenticate.
apiVersion: external-secrets.io/v1alpha1
kind: SecretStore
metadata:
  name: es-secret-store
spec:
  provider:
    vault:
      server: "http://vault.vault:8200"
      path: "kv"
      version: "v2"
      auth:
        kubernetes:
          mountPath: "kubernetes"
          role: "external-secrets-role"
$ kubectl apply -f external-secrets-secretstore.yml -n external-secrets
$ kubectl get secretstores.external-secrets.io -n external-secrets
NAME              AGE   STATUS   CAPABILITIES   READY
es-secret-store   9s    Valid    ReadWrite      True
Store & retrieve data from Vault
Everything is ready, we can create the first secret in our Vault. We use the kv put command to create it.
$ kubectl exec vault-0 -n vault -- vault kv put kv/path_to_secret password=averystrongpassword
===== Secret Path =====
kv/data/path_to_secret

======= Metadata =======
Key                Value
---                -----
created_time       2023-10-31T10:01:58.55193951Z
custom_metadata    <nil>
deletion_time      n/a
destroyed          false
version            1
To access this secret, we create an ExternalSecret that is reading from the SecretStore and writing the value found in the remoteRef in a new secret defined in the target attribute
apiVersion: external-secrets.io/v1beta1
kind: ExternalSecret
metadata:
  name: es-external-secret
spec:
  secretStoreRef:
    name: es-secret-store
    kind: SecretStore
  target:
    name: example-password
  data:
  - secretKey: mysecret
    remoteRef:
      key: path_to_secret
      property: password
# Create external secret
$ kubectl apply -f external-secrets-external-secret.yml -n external-secrets
# Check status
$ kubectl get externalsecrets.external-secrets.io
NAME                 STORE             REFRESH INTERVAL   STATUS         READY
es-external-secret   es-secret-store   1h0m0s             SecretSynced   True
# Check the secret value
$ kubectl get secrets example-password -o jsonpath='{.data.mysecret}' -n external-secrets| base64 -d
averystrongpassword%
We can see that the external secret is in SecretSynced status which means that the secret store is up-and-running and synchronized with Vault.
Test it
Let's try this in a "real" use case: we want to deploy an image that is hosted in a private registry (here a GitLab one) that requires authentication. We will store the credentials in Vault.
Before configuring it with Vault, our deployment looked like this, with sensitive data in plaintext (o base64 encoded): very bad! In a GitOps approach, manifests are committed into a source control management system, so accessible by "everyone"
apiVersion: v1
kind: Secret
metadata:
  name: gitlab-registry-unsecured-secret
  namespace: demo-external-secrets
data:
  .dockerconfigjson: eyJhdXRocyI6....
type: kubernetes.io/dockerconfigjson
---
apiVersion: apps/v1
kind: Deployment
metadata:
  name: go-unsecured-sample
spec:
  selector:
    matchLabels:
      app: go-unsecured-sample
  template:
    metadata:
      labels:
        app: go-unsecured-sample
    spec:
      containers:
        - image: registry.gitlab.com/yodamad-trash/go-sample/go-sample
          name: go-sample
          ports:
            - containerPort: 80
      imagePullSecrets:
        - name: gitlab-registry-unsecured-secret
Anyone with access to the repository can easily retrieve our GitLab token. Let's switch this secret to Vault. We need to create a new SecretStore as we cannot use the one we've already created as it's limited to the namespace where it is created.
It's possible to share a SecretStore across namespaces by using a ClusterSecretRole
First, create elements in Vault
$ kubectl exec vault-0 -n vault -- vault kv put kv/gitlab/credentials username=yodamad password=$GITLAB_TOKEN
======= Secret Path =======
kv/data/gitlab/credentials

======= Metadata =======
Key                Value
---                -----
created_time       2023-11-04T20:57:59.203145487Z
custom_metadata    <nil>
deletion_time      n/a
destroyed          false
version            1
Then create the SecretStore, the ExternalSecret and the Deployment
apiVersion: external-secrets.io/v1beta1
kind: SecretStore
metadata:
  name: es-gitlab-secret-store
spec:
  provider:
    vault:
      server: "http://vault.vault:8200"
      path: "kv"
      version: "v2"
      auth:
        kubernetes:
          mountPath: "kubernetes"
          role: "external-secrets-role"
---
apiVersion: external-secrets.io/v1beta1
kind: ExternalSecret
metadata:
  name: es-gitlab-registry
spec:
  refreshInterval: 1m
  secretStoreRef:
    name: es-gitlab-secret-store
    kind: SecretStore
  target:
    name: gitlab-registry-secret
    template:
      type: kubernetes.io/dockerconfigjson
      engineVersion: v2
      data:
        .dockerconfigjson: '{ "auths": { "registry.gitlab.com": { "auth": "{{ printf "%s:%s" .username .password | b64enc }}"}}}'
  data:
  - secretKey: username
    remoteRef:
      key: gitlab/credentials
      property: username
  - secretKey: password
    remoteRef:
      key: gitlab/credentials
      property: password
---
apiVersion: apps/v1
kind: Deployment
metadata:
  name: go-sample
spec:
  selector:
    matchLabels:
      app: go-sample
  template:
    metadata:
      labels:
        app: go-sample
    spec:
      containers:
        - image: registry.gitlab.com/yodamad-trash/go-sample/go-sample
          name: go-sample
          ports:
            - containerPort: 80
      imagePullSecrets:
        - name: gitlab-registry-secret
Now we can check that everything is deployed in our demo namespace (here I use get-all plugin to list all resources including CRD-based components.
$ kubectl get-all --namespace=demo-external-secrets
NAME                                                    NAMESPACE              AGE
pod/go-sample-848cd45cb6-m4r6s                          demo-external-secrets  11m
secret/gitlab-registry-secret                           demo-external-secrets  11m
deployment.apps/go-sample                               demo-external-secrets  11m
replicaset.apps/go-sample-848cd45cb6                    demo-external-secrets  11m
externalsecret.external-secrets.io/es-gitlab-registry   demo-external-secrets  11m
secretstore.external-secrets.io/es-gitlab-secret-store  demo-external-secrets  11m

# Check pod is Running
$ kubectl get po
NAME                                   READY   STATUS    RESTARTS   AGE
go-sample-848cd45cb6-m4r6s             1/1     Running   0          15m
Enabling the UI
Vault provides a UI to visualize and configure elements into the vault. By default it's disabled. It can be able when using the dev mode or by enabling when installing the Helm chart. There are several configurable keys for the UI, here we just enable it with the default configuration.
global:
  ui:
    enabled: true
$ helm upgrade vault hashicorp/vault -f vault-helm-values.yml
Release "vault" has been upgraded. Happy Helming!
[...]
UI service is listening by default on the port 8200 but is not exposed outside of the cluster. We can either set up an ingress to access from everywhere or just to a port-forwarding command to access it locally
$ kubectl port-forward svc/vault 8200:8200
Forwarding from 127.0.0.1:8200 -> 8200
Forwarding from [::1]:8200 -> 8200
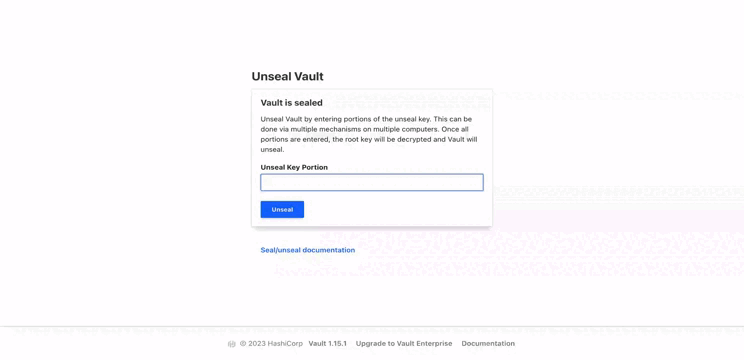
We can access the UI with the same mechanism as the CLI : 3 unseal keys and the root token. Once authenticated, we can access all elements we have configured: roles, policies, secrets...
Sealed state
A quick chapter to show what occurs if the vault is sealed. First, we seal it
$ kubectl exec vault-0 -n vault -- vault operator seal
Success! Vault is sealed.
We can see that the vault-0 pod is back to 0/1 state
$ kubectl get po -n vault
NAME                                    READY   STATUS    RESTARTS   AGE
vault-0                                 0/1     Running   0          26h
vault-agent-injector-7c48dbf948-mpx2c   1/1     Running   0          26h
if we try to put a new secret in the vault, we get an error
$ kubectl exec vault-0 -n vault -- vault kv put kv/path_to_secret another_password=easyone
Error making API request.

URL: GET http://127.0.0.1:8200/v1/sys/internal/ui/mounts/kv/path_to_secret
Code: 503. Errors:

* Vault is sealed
command terminated with exit code 2
Also if we force a resynchronization, the SecretStore changes to the status SecretSyncedError and the ExternalSecret has the status SecretSyncedError and is not ready anymore.
# Force resynchronization of the ExternalSecret
$ kubectl annotate es es-example force-sync=$(date +%s) --overwrite
externalsecret.external-secrets.io/es-example annotate

# Check ExternalSecret status
$ kubectl get externalsecrets.external-secrets.io -A
NAMESPACE          NAME                   STORE             REFRESH INTERVAL   STATUS              READY
external-secrets   es-external-secret     es-secret-store   1h0m0s             SecretSyncedError   False

# Check SecretStore status
$ kubectl get externalsecrets.external-secrets.io
NAME           STORE             REFRESH INTERVAL   STATUS              READY
es-example     es-secret-store   1h0m0s             SecretSyncedError   False
Conclusion
This is all for this article which gives an overview of the basic features of both Vault and external-secrets. With these components in your cluster, you can easily and securely manage your secrets.
Combined with kyverno for instance, you can easily check that all secrets created with external-secrets and not directly in the cluster by verifying that the label reconcile.external-secrets.io/created-by is present on the secret. If you want to learn about kyverno, you can check my article about the subject.
Both tools provided a large scope of features that you can discover from their documentation which are quite complete and well illustrated:
Vault documentation
External-secrets documentation
At the time this article was written:
Vault was in v1.15.1
external-secrets was in v0.9.8
Thank you OVHcloud for the hosting for the demos.
Resources are available in a dedicated GitLab repository on gitlab.com.


