In this new article, we will talk about Helm, about #GitOps, about Flux and a little about GitLab.
The objective is to explain how to create and publish a Helm chart, in a GitLab registry, and then deploy it with GitOps approach with the help of Flux.
Create Helm chart
Let's start from scratch and create a new Helm chart for this article. This can be done easily with helm create command
> helm create demo-helm
Creating demo-helm
> ls
Chart.yaml  charts      templates   values.yaml
We can quickly explain these elements for those who discover Helm:
Chart.yml is the main file describing the chart's main elements (name, version...)
templates directory is where we put all the files to apply in the chart with a templating mechanism to pass dynamically some values to fill the fields
values.yml are the default values that Helm will apply to the templates if none are passed when running the
helmcommands(optional) charts directory is where we include some other charts that our chart may need to work. We won't use it here, just deleting it 🚮
By default, the create command generates several examples of components:
$ ls -l templates
total 56
-rw-r--r--  1,7K NOTES.txt
-rw-r--r--  1,8K _helpers.tpl
-rw-r--r--  1,8K deployment.yaml
-rw-r--r--  997B hpa.yaml
-rw-r--r--  2,0K ingress.yaml
-rw-r--r--  367B service.yaml
-rw-r--r--  324B serviceaccount.yaml
drwxr-xr-x  96B  tests
Here we'll keep only a service, an ingress and a deployment. As an example, a generated template looks like this:
apiVersion: v1
kind: Service
metadata:
  name: {{ include "demo-helm.fullname" . }}
  labels:
    {{- include "demo-helm.labels" . | nindent 4 }}
spec:
  type: {{ .Values.service.type }}
  ports:
    - port: {{ .Values.service.port }}
      targetPort: http
      protocol: TCP
      name: http
  selector:
    {{- include "demo-helm.selectorLabels" . | nindent 4 }}
We won't go into the details regarding Helm templating mechanism, but we can just focus on 2 elements:
includeis used to interpret values from the_helpers.tplfile (or any other that you've created).Valuesare elements that will come from thevalues.ymlfile by default or any value that is set while running thehelmcommand
Here are the default values that we will inject through the values.yml file:
replicaCount: 2

image:
  repository: nginxdemos/hello
  pullPolicy: IfNotPresent
  # Overrides the image tag whose default is the chart appVersion.
  tag: "latest"

podAnnotations: {}

service:
  type: ClusterIP
  port: 80

ingress:
  enabled: true
  annotations: {
    kubernetes.io/ingress.class: 'nginx',
    cert-manager.io/cluster-issuer: 'letsencrypt-production'
  }
  hosts:
    - host: demo-helm.ovh.yodamad.fr
      paths:
        - path: /
          pathType: Prefix
  tls:
    - secretName: nginx-demo-tls
      hosts:
        - demo-helm.ovh.yodamad.fr
Sources are available on GitLab, here is the current layout
$ ls -R
Chart.yaml  charts      templates   values.yaml

./templates:
NOTES.txt       _helpers.tpl    deployment.yaml ingress.yaml    service.yaml
Build and publish it
Now that we have our resources ready, let's package and deploy our Helm chart to be able to deploy it on our Kubernetes cluster.
Locally
First, we can basically build and publish it from our laptop with helm commands
# Package our file in a tgz
$ helm package --version=0.1.0 -d package .
Successfully packaged chart and saved it to: package/demo-helm-0.1.0.tgz
Now, our package is ready, we can push it to GitLab registry.
NB: GitLab supports https:// also.
# Setup variables
$ export GITLAB_TOKEN=<GITLAB_PERSONAL_ACCESS_TOKEN>
$ export GITLAB_USER=<GITLAB_USERNAME>
$ export GITLAB_PROJECTID=<GITLAB_PROJECT_ID>
# Log into remote registry
$ helm registry login -u $GITLAB_USER -p $GITLAB_TOKEN registry.gitlab.com
# Deploy to GitLab
$ helm push package/demo-helm-0.1.0.tgz oci://$CI_REGISTRY/fun_with/fun-with-k8s/fun-with-helm
Pushing demo-helm-0.1.0.tgz to demo-helm...
Done.
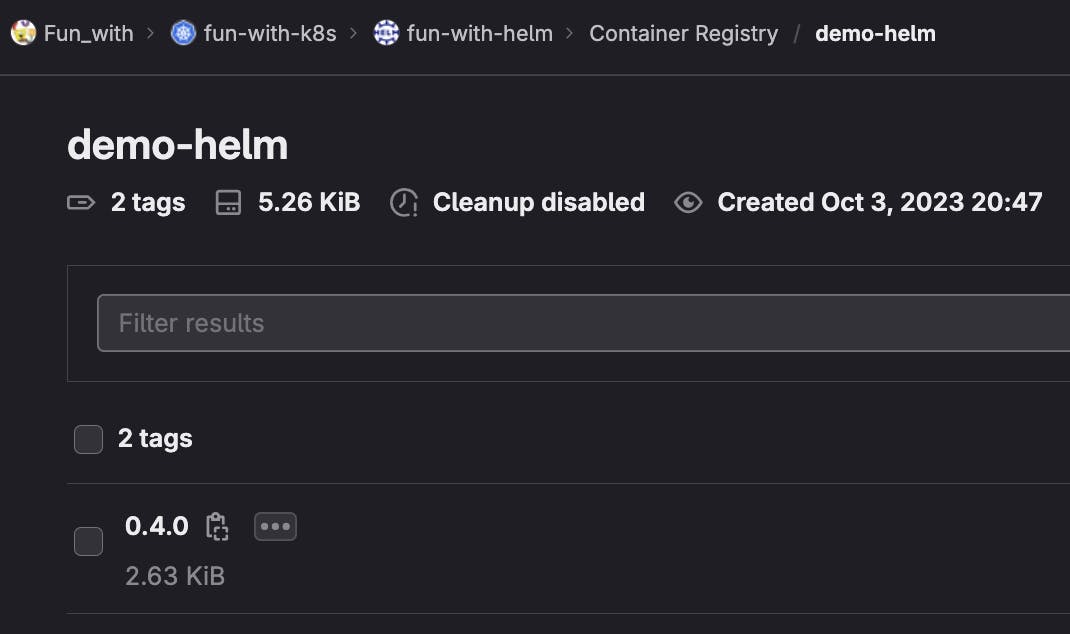
Connecting to GitLab UI, we can see that our chart is deployed

We are now ready to deploy it! 🚀
With GitLab
Another more industrialized way to do the same steps is to use GitLab-ci mechanism. We can reproduce always the same step in a gitlab-ci.yml
image: dtzar/helm-kubectl
stages:
- 🛃 check
- ⛴ package
- 💾 publish
👁️🗨️_lint:
stage: 🛃 check
script: helm lint . --strict
📦_generate_tgz:
stage: ⛴ package
script: helm package . --destination package
artifacts:
paths:
- package/*.tgz
📢_registry:
stage: 💾 publish
script:
- export TGZ=`ls package`
- helm registry login -u $CI_REGISTRY_USER -p $CI_REGISTRY_PASSWORD $CI_REGISTRY
- helm push package/$TGZ oci://$CI_REGISTRY/fun_with/fun-with-k8s/fun-with-helm
needs: ["📦_generate_tgz"]
only:
- main
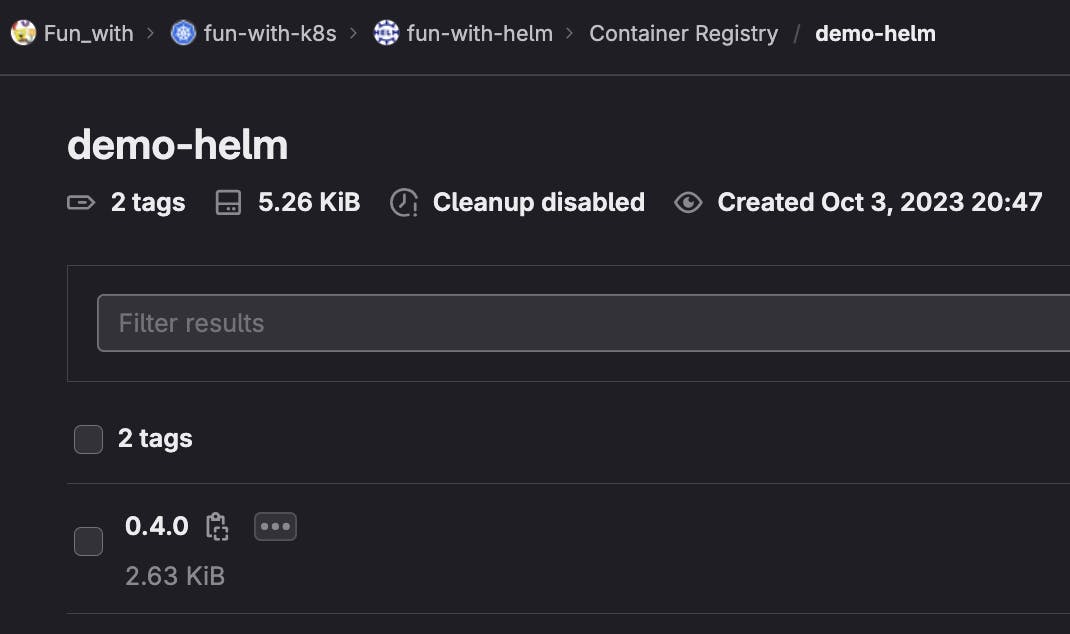
After our pipeline success, we can see a second tgz deployed in our registry

This is a very static way to deploy charts, but we'll see how to add some versioning to it later on. Let's deploy it before!
Deploy it with Flux
I won't go into the details of Flux here as I've already described it in a previous article.
Based on a preconfigured Flux installation, we need to describe our Helm deployment based on 2 components:
HelmRepository describes where the chart is hosted
- Here we have a
secretRefas our registry is private and need some authentication
- Here we have a
HelmRelease describes the chart to deploy, where to find it and which version to deploy. This version is based on semver notation
---
apiVersion: v1
kind: Namespace
metadata:
  name: demo-helm
---
apiVersion: v1
kind: Secret
metadata:
  name: gitlab-credz
  namespace: flux-system
data:
  password: ?
  username: ?
---
apiVersion: source.toolkit.fluxcd.io/v1beta2
kind: HelmRepository
metadata:
  name: demo-helm
  namespace: flux-system
spec:
  interval: 1h0m0s
  url: oci://registry.gitlab.com/fun_with/fun-with-k8s/fun-with-helm/
  type: oci
  secretRef:
    name: gitlab-credz
---
apiVersion: helm.toolkit.fluxcd.io/v2beta1
kind: HelmRelease
metadata:
  name: demo-helm
  namespace: flux-system
spec:
  chart:
    spec:
      chart: demo-helm
      sourceRef:
        kind: HelmRepository
        name: demo-helm
      version: 0.2.0
  interval: 1h0m0s
We can commit this in our repository maintaining our Flux resources (here). Flux will automatically detect the new repository and will install the release for us
$ kubectl logs -f helm-controller-7f8449fd58-xrczz
...
{"level":"info","ts":"2023-10-01T20:26:15.349Z","msg":"HelmChart 'flux-system/flux-system-demo-helm' is not ready","controller":"helmrelease","controllerGroup":"helm.toolkit.fluxcd.io","controllerKind":"HelmRelease","HelmRelease":{"name":"demo-helm","namespace":"flux-system"},"namespace":"flux-system","name":"demo-helm","reconcileID":"96875391-b1cf-4119-814d-1fae5378cfa9"}
{"level":"info","ts":"2023-10-01T20:26:15.368Z","msg":"reconcilation finished in 75.795112ms, next run in 1h0m0s","controller":"helmrelease","controllerGroup":"helm.toolkit.fluxcd.io","controllerKind":"HelmRelease","HelmRelease":{"name":"demo-helm","namespace":"flux-system"},"namespace":"flux-system","name":"demo-helm","reconcileID":"96875391-b1cf-4119-814d-1fae5378cfa9"}
...
Pass values
This is a good start, but you'll often need to deploy the same chart in several places like test environments. When running directly Helm, we can do this by using values from the CLI or in a dedicated values.yml file. It's possible to do the same with Flux by using values for the HelmRelease.
A first example is to provide information directly into the HelmRelease description. Here we create another yaml file to illustrate this. Note that we don't need to describe again the HelmRepository, we can use the same as for the 1st example.
---
apiVersion: v1
kind: Namespace
metadata:
  name: demo-values-helm
---
apiVersion: helm.toolkit.fluxcd.io/v2beta1
kind: HelmRelease
metadata:
  name: demo-values-helm
  namespace: flux-system
spec:
  chart:
    spec:
      chart: demo-helm
      sourceRef:
        kind: HelmRepository
        name: demo-helm
      version: 0.3.0
  interval: 10m0s
  values:
    namespace: demo-values-helm
    replicaCount: 8
    ingress:
      annotations: {
        kubernetes.io/ingress.class: 'nginx',
        cert-manager.io/cluster-issuer: 'letsencrypt-production'
      }
      hosts:
        - host: demo-values-helm.ovh.yodamad.fr
          paths:
            - path: /
              pathType: Prefix
      tls:
        - secretName: nginx-demo-tls
          hosts:
          - demo-values-helm.ovh.yodamad.fr
Once committed, we can see that Flux helm-controller is deploying this new release
$ kubectl logs helm-controller-7f8449fd58-xrczz
...
{"level":"info","ts":"2023-10-02T09:49:53.993Z","msg":"HelmChart 'flux-system/flux-system-demo-values-helm' is not ready","controller":"helmrelease","controllerGroup":"helm.toolkit.fluxcd.io","controllerKind":"HelmRelease","HelmRelease":{"name":"demo-values-helm","namespace":"flux-system"},"namespace":"flux-system","name":"demo-values-helm","reconcileID":"9954be71-ebec-4c6e-9eef-2e06ff682496"}
{"level":"info","ts":"2023-10-02T09:49:54.015Z","msg":"reconcilation finished in 81.510791ms, next run in 10m0s","controller":"helmrelease","controllerGroup":"helm.toolkit.fluxcd.io","controllerKind":"HelmRelease","HelmRelease":{"name":"demo-values-helm","namespace":"flux-system"},"namespace":"flux-system","name":"demo-values-helm","reconcileID":"9954be71-ebec-4c6e-9eef-2e06ff682496"}
...

# Check our newly created namespace
$ kubectl get po -n demo-values-helm
NAME                                          READY   STATUS    RESTARTS   AGE
demo-values-helm-demo-helm-57f6fcb54b-9kwf2   1/1     Running   0          5m59s
demo-values-helm-demo-helm-57f6fcb54b-g8cdm   1/1     Running   0          5m59s
demo-values-helm-demo-helm-57f6fcb54b-pzrgz   1/1     Running   0          5m59s
demo-values-helm-demo-helm-57f6fcb54b-r2tmk   1/1     Running   0          5m59s
demo-values-helm-demo-helm-57f6fcb54b-s2xwt   1/1     Running   0          5m59s
demo-values-helm-demo-helm-57f6fcb54b-v7ttd   1/1     Running   0          5m59s
demo-values-helm-demo-helm-57f6fcb54b-z2897   1/1     Running   0          5m59s
demo-values-helm-demo-helm-57f6fcb54b-z6l9v   1/1     Running   0          5m59s
This works but is not very convenient if you need many values. Your yaml file would become very big. Another way to do so is to refer to a configmap that contains values we want to apply. Let's create another HelmRelease and the associated ConfigMap
---
apiVersion: v1
kind: Namespace
metadata:
  name: demo-configmap-helm
---
apiVersion: v1
kind: ConfigMap
metadata:
  name: demo-configmap-helm
  namespace: flux-system
data:
    helm-values.yaml: |
        namespace: demo-configmap-helm
        replicaCount: 2
        ingress:
          annotations: {
            kubernetes.io/ingress.class: 'nginx',
            cert-manager.io/cluster-issuer: 'letsencrypt-production'
          }
          hosts:
            - host: demo-configmap-helm.ovh.yodamad.fr
              paths:
                - path: /
                  pathType: Prefix
          tls:
            - secretName: nginx-demo-tls
              hosts:
              - demo-configmap-helm.ovh.yodamad.fr
---
apiVersion: helm.toolkit.fluxcd.io/v2beta1
kind: HelmRelease
metadata:
  name: demo-configmap-helm
  namespace: flux-system
spec:
  chart:
    spec:
      chart: demo-helm
      sourceRef:
        kind: HelmRepository
        name: demo-helm
      version: 0.3.0
  interval: 10m0s
  valuesFrom:
  - kind: ConfigMap
    name: demo-configmap-helm
    valuesKey: helm-values.yaml
And last, there is another way to pass values to your HelmRelease if you want to manage the different value sets in the repository handling the Helm chart.
Just create a dedicated file in the helm chart repository, for instance, values-demo.yaml
namespace: demo-inside-helm
replicaCount: 1

image:
  repository: nginxdemos/hello
  pullPolicy: IfNotPresent
  # Overrides the image tag whose default is the chart appVersion.
  tag: "latest"

podAnnotations: {}

service:
  type: ClusterIP
  port: 80

ingress:
  enabled: true
  annotations: {
    kubernetes.io/ingress.class: 'nginx',
    cert-manager.io/cluster-issuer: 'letsencrypt-production'
  }
  hosts:
    - host: demo-inside-helm.ovh.yodamad.fr
      paths:
        - path: /
          pathType: Prefix
  tls:
    - secretName: nginx-demo-tls
      hosts:
        - demo-inside-helm.ovh.yodamad.fr
Commit and bundle the chart in your chart registry, then in the repository managing Flux resources, create a new HelmRelease using the values file just created
---
apiVersion: v1
kind: Namespace
metadata:
  name: demo-inside-helm
---
apiVersion: helm.toolkit.fluxcd.io/v2beta1
kind: HelmRelease
metadata:
  name: demo-inside-helm
  namespace: flux-system
spec:
  chart:
    spec:
      chart: demo-helm
      sourceRef:
        kind: HelmRepository
        name: demo-helm
      valuesFiles:
        - values-demo.yaml
      version: 0.3.0
  interval: 10m0s
Once committed, Flux will detect all releases and deploy your resources.
Now you just have to just to choose which fits you the best
Push a new version of the chart
In the previous samples, we've hardcoded the chart version. This is not convenient if we want to automatically upgrade our resources if we deploy a new version of the chart (for instance for a test environment). Let's see how we can do that with Flux. We'll adapt the basic simple of the HelmRelease
First, let's change in my values.yml the base image and the DNS
...
image:
  repository: d3fk/asciinematic
...
ingress:
...
  hosts:
    - host: demo-ascii.ovh.yodamad.fr
...
  tls:
...
      hosts:
        - demo-ascii.ovh.yodamad.fr
Now, I have to upgrade to 0.4.0 the version of my chart in Chart.yml and publish it to my GitLab registry. Once published, change the version value in the HelmReleasedescription to respect semver notation : 0.x.x for all versions starting by 0.
apiVersion: helm.toolkit.fluxcd.io/v2beta1
kind: HelmRelease
metadata:
  name: demo-helm
  namespace: flux-system
spec:
  chart:
    spec:
      chart: demo-helm
      sourceRef:
        kind: HelmRepository
        name: demo-helm
      version: 0.x.x
  interval: 1h0m0s
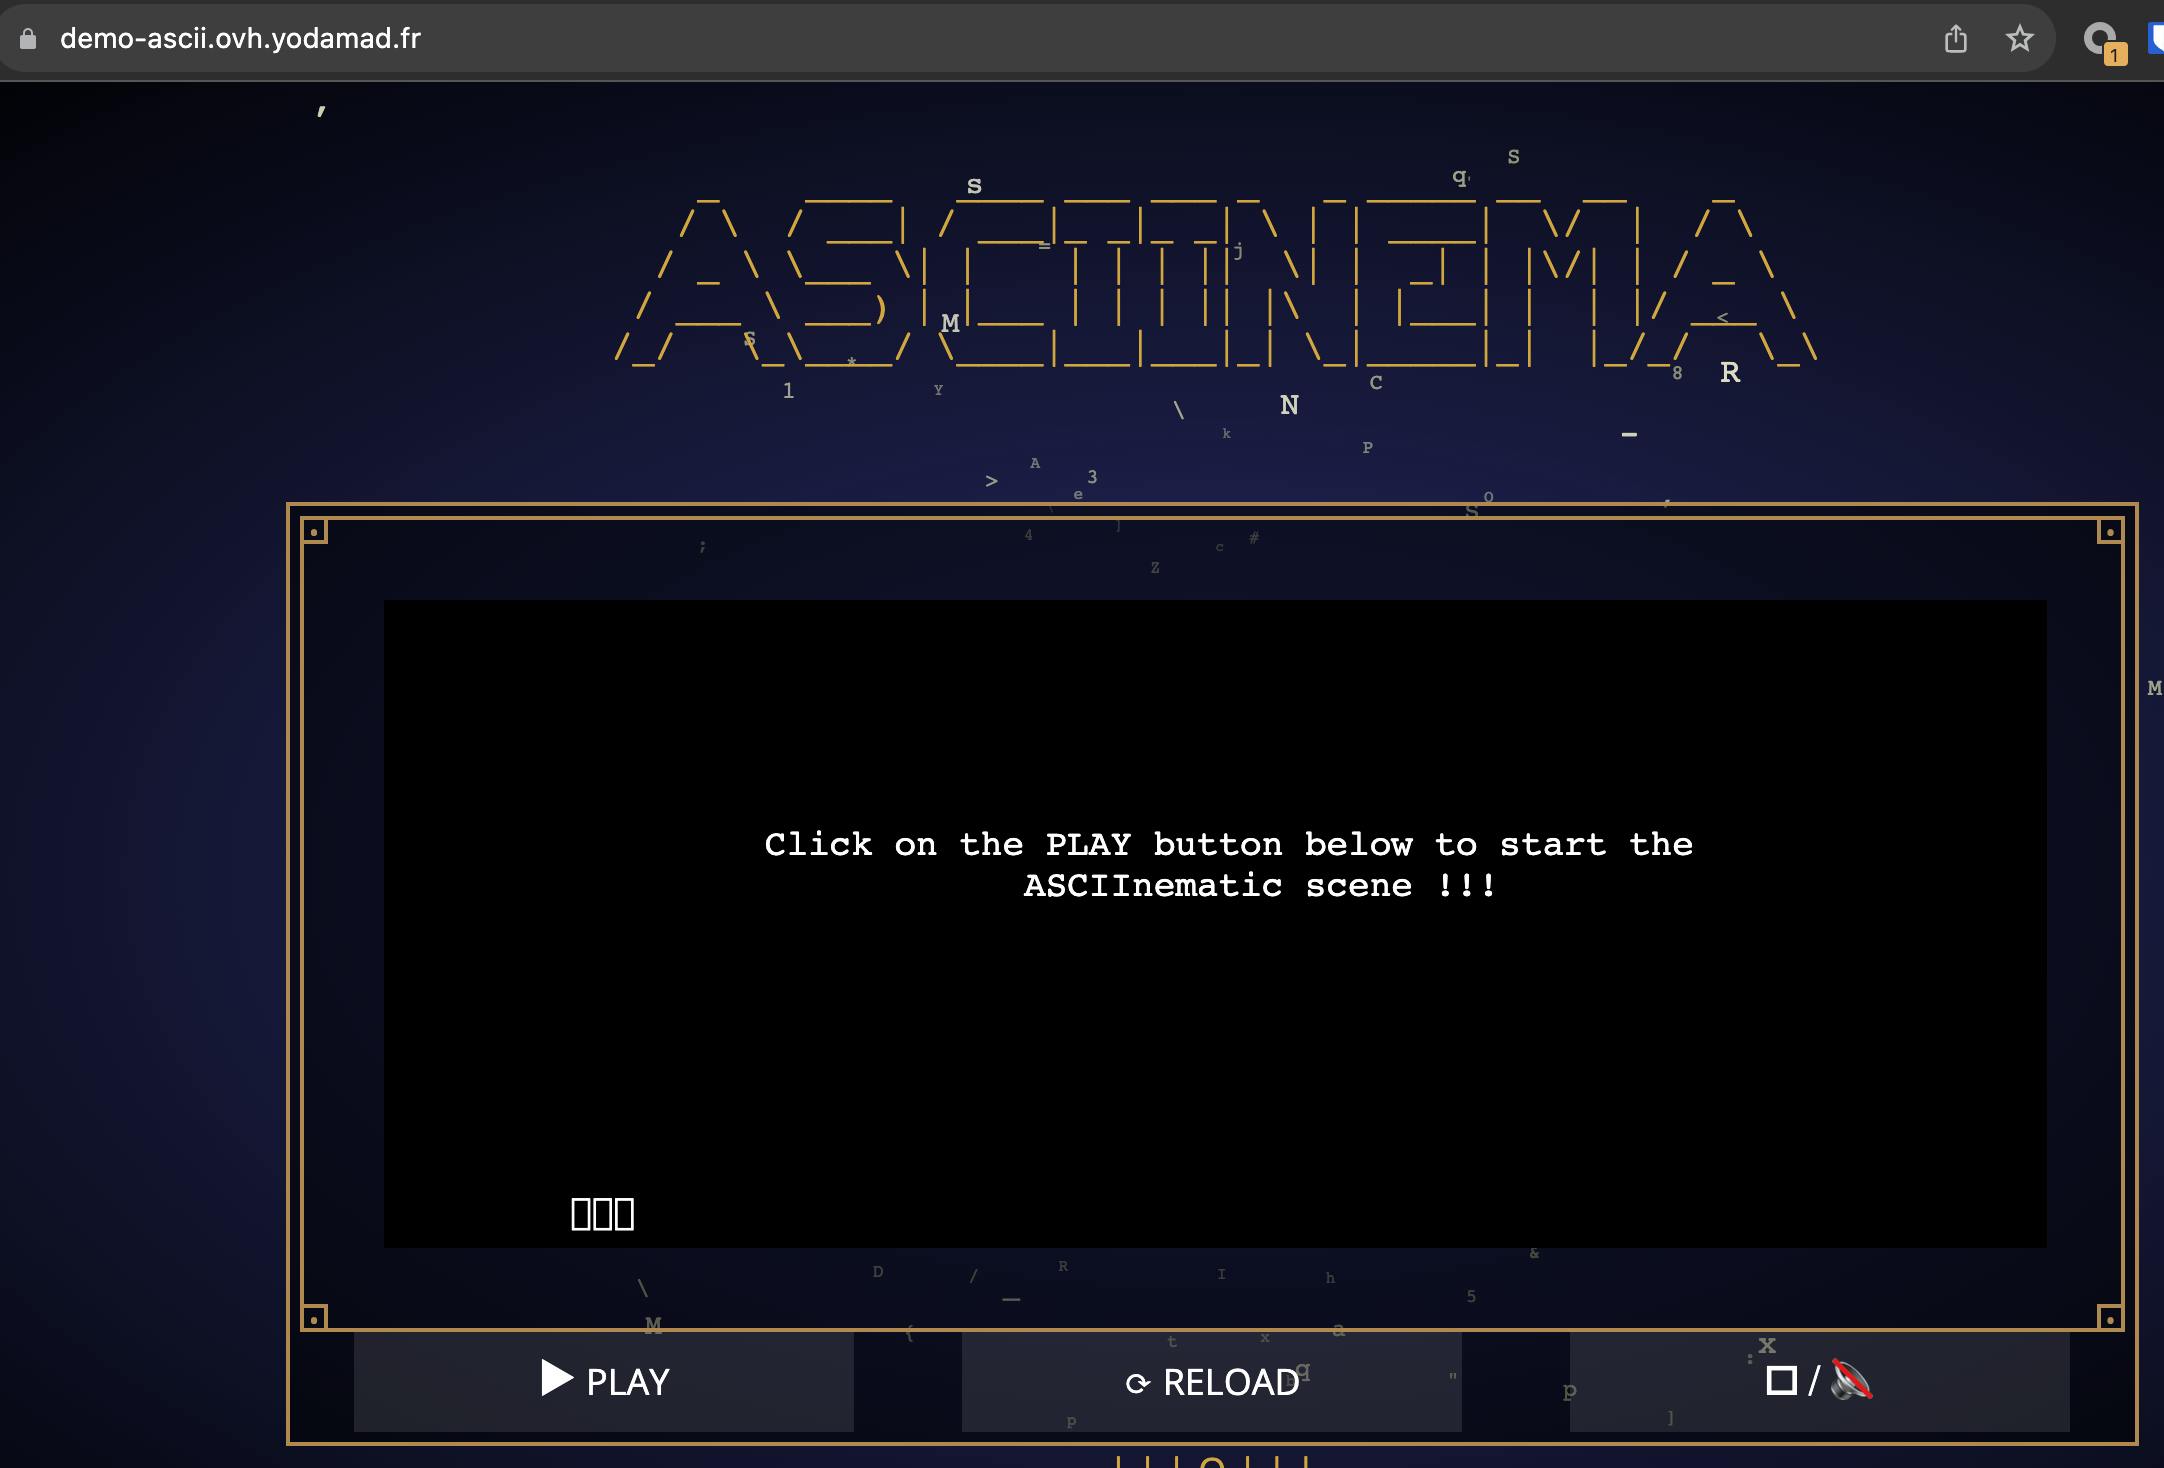
Commit and let the magic happens: few time after I've a cool ASCII cinema deployed rather than a static Nginx HTML page, deployed to a new URL.

Conclusion
With this article, you can now easily manage Helm charts deployments with FluxCD with a GitOps approach.
Combining 2 flexible tools, helps you to adapt your GitOps approach and the continuous deployment process within your project.
A minor drawback is the Flux documentation which doesn't bring much examples, so you can struggle sometimes if you don't follow the basic explanation.
A little tip, that helped me a lot while writing this article: use a lot kubectl get event to help understand when something is going wrong or if nothing happens, or kubectl describe to get event more details
Thank again to OVHcloud for the support for the environment
Sources are available
for Flux resources: https://gitlab.com/fun_with/fun-with-k8s/fun-with-fluxcd
for Helm resources: https://gitlab.com/fun_with/fun-with-k8s/fun-with-helm

